Automatically Tracking Use Tax in Dynamics GP
Use Tax has been a thorny problem for many accounting systems to track, but fortunately, there’s a way to do it in Microsoft Dynamics GP you might not have considered. It’s true that you can get robust and amazing functionality around taxation for Dynamics GP, but if your needs are modest you have other options. Here’s a step-by-step guide on how you can set this up using the functionality you already own.
First a note about why Use Tax is so weird. With regular sales tax you either collect the tax on a sale along with the proceeds or you pay the tax along with your purchase. The tax moves along with the regular payment. Not true with Use Tax, though.
Suppose you purchase a laptop and the vendor who sold it to you wasn’t required to collect sales tax. Depending on a variety of rules (we won’t get into that here) you may have to pay your state a tax. So you want to pay your vendor for just the laptop while still tracking the purchase amount and the tax payable so you can pay that down the line.
If the tax was paid to the vendor this wouldn’t be tricky, but here we are.
To have Microsoft Dynamics GP automatically track Use Tax, we have a few steps.
Enable a Company Setting for Reverse Charges
For each company where you want to track Use Tax, head on over to the company settings (Microsoft Dynamics GP > Tools > Setup > Company > Company, Options Button) and check a box enabling Reverse Charges for taxes.
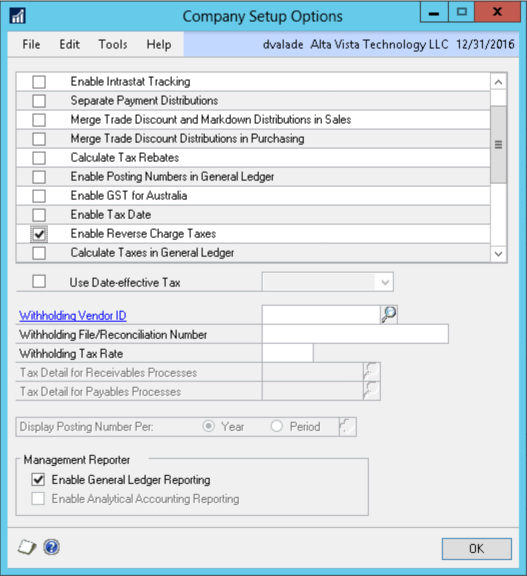
This is pretty well hidden so don’t be embarrassed if you missed it.
This setting will allow you to have negative tax details, but more on that later.
Setting Up Tax Details
GP lets you set up a “Tax Schedule” that’s made up of one or more “Tax Details.” (Microsoft Dynamics GP > Tools > Setup > Company > Tax Details) If you’ve ever seen a laundry list of tax charges when checking out of a hotel you can understand the thinking here. Taxes can be grouped.
For our clever Use Tax trick we’re going to make two different details, one positive and one negative. First, the positive:
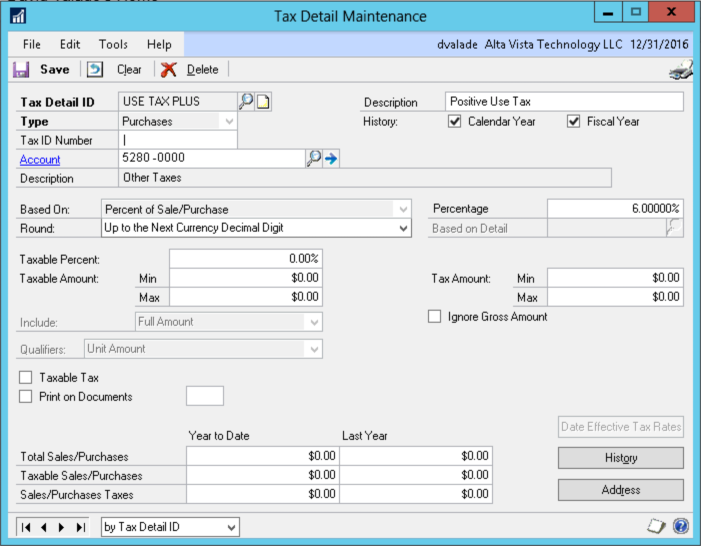
Note that the account number used is the use tax expense account I want to use. Also, I’m using 6% but your tax rate may differ.
Next, we make the negative:
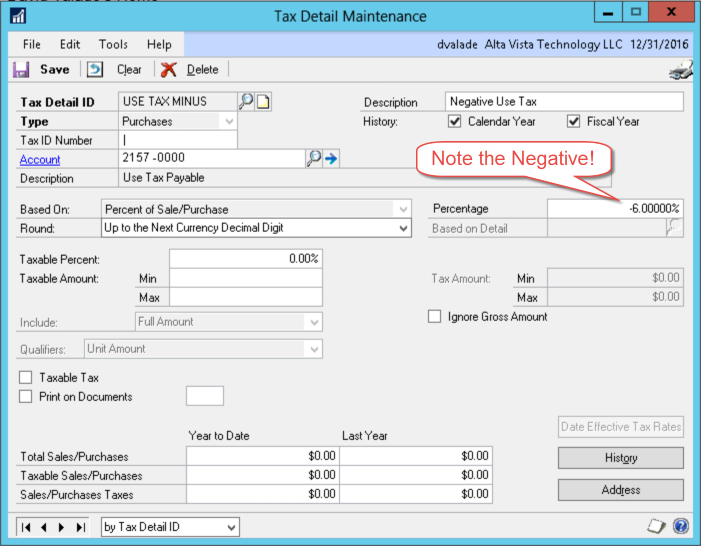
It’s important to use the same percentage here on the negative as I have on the positive detail. Aside from the Tax Detail ID, the only difference between the positive and the negative is the account number. Here on the negative I want to use the liability account number.
Pulling it All Together
Now we make our Tax Schedule ID, which is the parent record. We assign our two offsetting details to it.
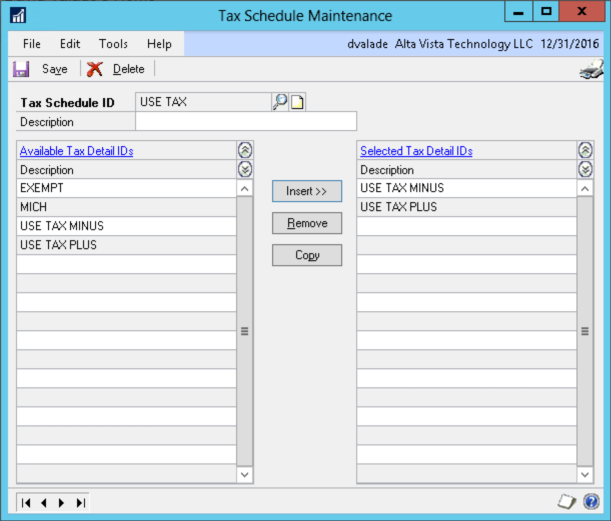
And now? We’re done!
So long as the shipping method we use is a “pickup” style shipping method we only need to pick the Tax Schedule ID on the purchase.
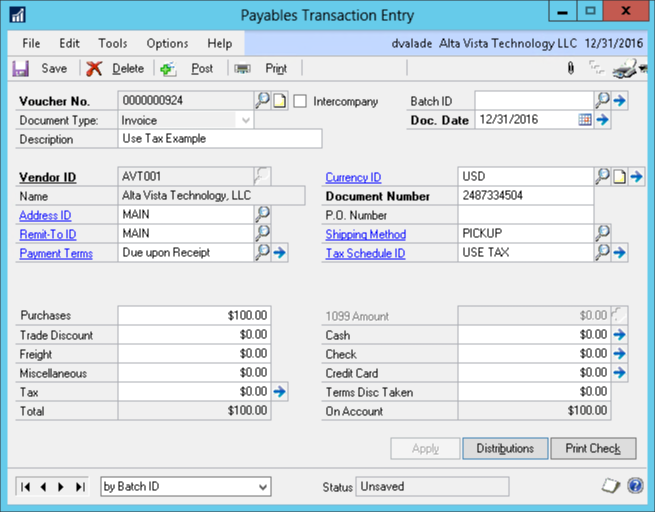
Notice how we don’t have any dollar amounts added to the total of this voucher? That’s perfect! The whole idea with Use Tax is that we don’t want to pay more on the payable, just track that we have to pay taxes at the end of the month.
Drilling into the distribution shows that this is PERFECT:
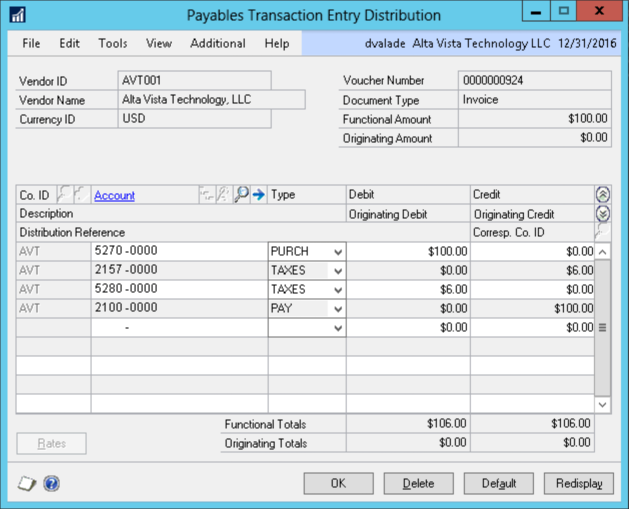
When we’re all done we have the following benefits:
- GP automatically figured out the Use Tax expense and payable for us.
- The Use Tax will show up on all company reports so we know the taxable amount and tax amount.
- We correctly track everything so we’re sure to remit the Use Tax to the correct authority when we need to.
Just like that, we’ve done it.


